Documents
Alternative Text
- For images, charts and graphs, add alt text that describes both content and function.
- Tag images that do not present important content or do not have a function (e.g., is not a link) as decorative. If your software doesn’t allow you to mark an image as decorative, add alt=“” in the alt text box.
Google Docs How-To
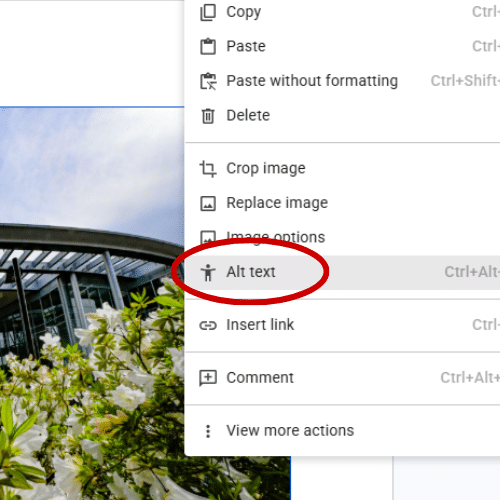
- Right-click the image.
- Select Alt text.
- Add alt text in the Description box.
Color and Contrast
- Do not use only color to convey information, indicate an action or distinguish a visual element. Use a second visual cue.
- Some software has built-in contrast checkers. For those that do not, consult the WebAIM Contrast Checker.
Google Docs How-To
You can change color in a number of different ways:
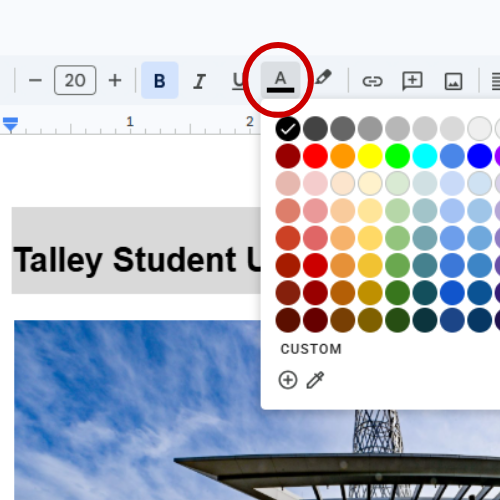
- Text: Select a text and/or highlight color.
- Objects: Select background and border colors.
- Background: Click File, then select Page setup to set a background color.
Links
- Always link meaningful text instead of including the full URL, which is difficult for screen readers.
- Meaningful text means clearly describing where the link points. For example, see how the “Color and Contrast” section above links “WebAIM Contrast Checker” to let you know the link points to that tool.
Google Docs How-To
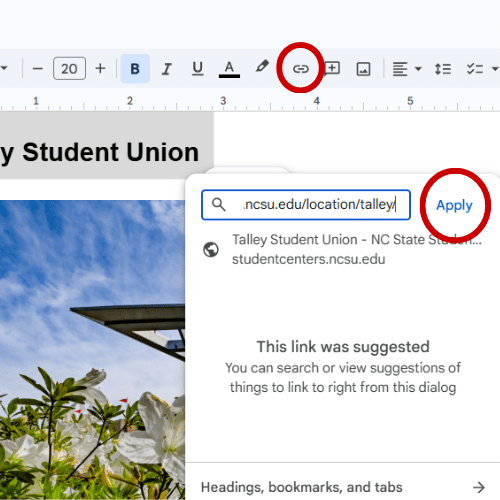
- Highlight text.
- Click the Link icon.
- Paste the URL into the link field.
- Click Apply.
Lists
- Use the built-in list tools to ensure your lists are accessible.
- Use bullets for unordered lists and numbers for ordered lists.
- Only use a list structure for logical lists.
Google Docs How-To
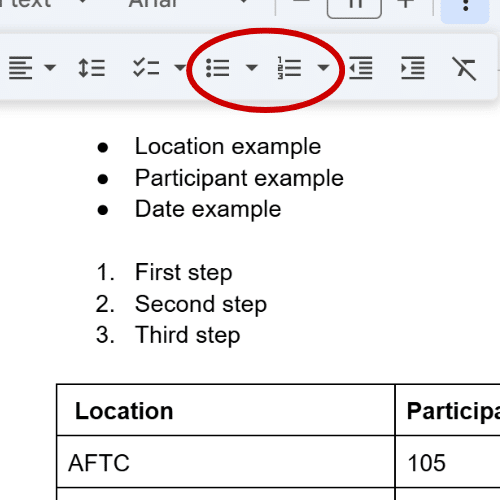
- Click Bulleted list or Numbered list icon.
- Type your first list item.
- Hit Enter to create the next list item.
Structure
- Use built-in styles to select headings and organize the structure of your document.
- Use only one Heading 1 or Title attribute per document.
- Follow a logical order for heading levels — don’t skip from a Heading 1 to a Heading 3.
- If your document is longer than 20 pages, add a Table of Contents. It updates automatically and helps readers navigate with assistive technology.
Google Docs How-To
To change the default heading styles in Google Docs:

- Write your heading text.
- Click the Styles menu and select the correct heading.
- Change the font, color, size, etc. until you are satisfied with your changes.
- Note: Stop now if you want to change only this instance of the heading. If you’d like to apply these changes to all of your headings of the same style, continue to step 4.
- Click the Styles menu and hover over the heading level you are using.
- Select Update [heading level] to match. Every instance of that heading level will be updated to the font, size and color you chose.
- Select Styles menu, hover over Options and then select Save as my default styles.
Tables
- Only use tables to display data, not to format content. When tables are used properly, assistive technology can interpret header rows and the relationship between data cells.
- Mark your first row as a header row, if the software allows.
- Keep tables as simple as possible. Avoid merging and splitting cells.
- Add a brief explanation above the table, if needed.
Google Docs How-To
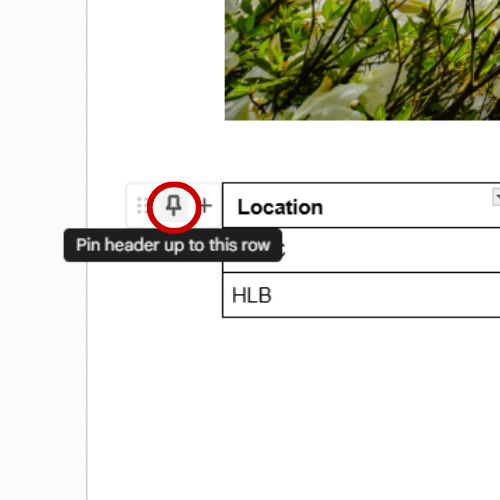
Built-in accessibility options for tables are limited in Google Docs. Follow the instructions below to pin your header row and then use Grackle to make additional adjustments.
- Click Insert.
- Select Table.
- Use your cursor to choose the number of rows and columns.
- Type in your data, remembering to reserve the first row as a header row.
- Hover over the top row with your cursor and click the pushpin icon in the small menu that appears.
Grackle Accessibility Checker
Grackle is a Google Workspace add-on that provides an automated accessibility report with information about how to improve the accessibility of your Google Docs, Sheets and Slides.
Once installed and launched, the Grackle panel will open on the right side of your screen. The Accessibility Check will flag errors for you to fix in your document. Click an item in the Grackle panel to navigate to that item in your document. Once you fix your errors, click Re-Check to scan again.